New Player Walkthrough
Introduction
Salem is a lovely MMO game “focused on all manner of crafting (farming, building, invention and so forth) and developing [the] required character skills for doing so. It also features free-for-all PvP combat with the possibility to permanently kill player characters.”[2] This can be very intimidating for new players who fear losing all their progress at the hands of veterans. This walkthrough aims to help new players by going a little further than a guide and outlining, step-by-step, how straight-forward it is to get started or back on your feet after a setback.
Progress in Salem is understood by the fact that increasingly stronger characters can make increasingly stronger bases that can in turn make increasingly stronger characters. While it is tempting to put all of one’s eggs in one basket and follow the path and progression of a single “main” character through the game, you (and your friends) will likely enjoy more success playing several characters. If you already have experience managing multiple characters in other games (e.g., in a combat party or in a household/village, etc.) then managing different characters in a Salem homestead may feel familiar to you.
One of the interesting features of Salem is that the “world is persistent and mutable, meaning player characters are able to make permanent changes to it by destroying and building landscape and houses etc.”[3] In fact, the current Providence server has persisted online since February 2014 and many veterans have by this point built extensive industrial complexes behind heavy fortifications. The in-game economy is quite stable and it is very easy for new players to procure more advanced foods to quickly boost the strength of their characters and procure more advanced materials to quickly build more advanced defences, tools, and structures at the start of their journey.
Most of the early game mechanics can be skipped entirely if new players plan on joining an established town, buying from established players, or taking over an abandoned base and salvaging from other abandoned bases. The early game is outlined here in detail for new players who wish to learn and practice these mechanics nonetheless or for those (who like me) were drawn to Salem for the rewarding challenge of venturing into the wilderness and establishing a self-sufficient homestead from scratch. This walkthrough outlines how to #Create a New Character, #Craft a Prospecting Tool, and #Plan a Self-Sufficient Homestead. We'll also discuss #Next Steps.
Create a New Character
Introduction
The homestead will start with a Novice Tanner but being the very first character they will also learn a variety of other skills, including Prospecting. Since learning skills requires spending Inspiration and this pool of points is limited, we will practice using the 3rd Party Proficiency Learning Optimizer at first before switching over to using whatever Inspirationals are most convenient later on. New players that only develop single "main" character may find that they run out of Inspiration before their jack-of-all-trades learns all the skills they want, whereas new players that #Create a Team of Characters for their homestead benefit from all of them passively generating Inspiration in parallel and all of them focusing their studies towards a certain profession.
The Tutorial
| Collect:
(
|
| After crafting and equipping the
|
| After learning Colonial Tradesmanship:
|
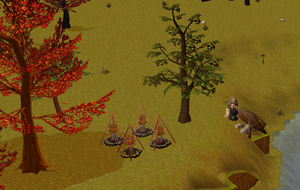
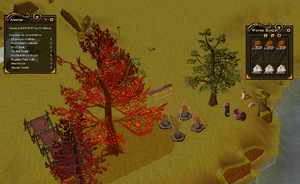
The Tutorial will teach you the basic game mechanics. Once the in-game tutorial is completed and your character travels with the Native Guide to select a homestead in Providence, the character is saved on the server and you can log out without losing your progress (See #Arrive in Providence). In this Walkthrough, we will stay in the Tutorial longer to build more tools, learn more skills, and gather more materials before beginning our journey with the Native Guide.
- Collect the listed items. Tip: Open the helpful Abacus Window (Ctrl+A) in a 3rd Party custom client.
- Follow the tutorial instructions, using a
 Stray Chestnut or
  Smooth Stone to learn the skill Survival Skills and then again to learn the skill Lore of The Lumberwoods.
- When prompted to build a
 Drying Frame, a building window pops up requesting 5x
  Branch. Hover over that branch icon in the building window and Shift+Scroll Wheel to quickly fill it with appropriate materials from your inventory.
 - When prompted, glutton one
 Hickory Nut and proceed.
 - When prompted to increase your proficiency cap, craft 1x
 Leafy Leftovers (3 uses), study it once, and then click the
  Flora & Fauna proficiency bar to upgrade its cap from 500 to 700.
 - When prompted, study
 Leafy Leftovers again to learn the skill Colonial Tradesmanship.
 - Eat a hickory nut to replenish your Humours.
- When prompted to build a
| Tip: In a 3rd Party custom client, you open the helpful Abacus Window (Ctrl+A) |
Learn  Collector
- Start collecting branches from a tree and continue until you receive 3x
 Broken Bough among them, discarding (Ctrl+Alt+Left Click) any regular
  Branch to save weight.
 - Study the 3x
 Broken Bough. Study 1x
  Oak Duff. Craft and then study 1x
  Rock Maracas.
 - Learn the skill Collector. This allows you an additional 5kg of carry weight.
Craft 1x  Wooden Shovel
| Collect:
|
In this Walkthrough, we will stay in the Tutorial longer to build more tools, learn more skills, and gather more materials before beginning our journey with the Native Guide. A shovel is a handy second tool to have for digging soil and quarrying useful materials like clay and lime. This is an important first step in gathering clay, crafting clay pots, crafting leather, crafting a prospecting tool, and then scouting the ideal base location on the Providence server.
Learn  Whittling
- Collect the listed items.
- With your axe still equipped, right-click 1x
 Woodblock in your inventory to split it into 2x
  Wood Choppings. Study both to upgrade your
  Hammer & Nail proficiency from 500 to 700.
 - Craft and study 1x
 Lumberwood Figurine to learn the skill Whittling.
 - Collect 17x
 Woodblock and use 10x to build a
  Whittler's Bench and 7x
  Woodblock to craft a
  Wooden Shovel.
Craft  Clay Pot
One of the early game methods of making Tanning Fluid for leather is to boil Birch Bark in a Clay Pot. We will need 20L of Tanning Fluid to make 2x Leather. You will need a minimum of 4 Clay Pots but 6 or more is preferred. We will use a crude early game clay firing method with a lower rate of success.
| Collect/Craft:
|
|
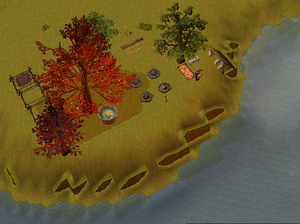
- With your axe still equipped, chip 10x Stones and craft a
 Fireplace near the clay pit to the north. You can add fuel to it by right-clicking a
  Branch on the stones. Tip: You can any qualifying fuel in your inventory faster (and indiscriminately) by holding down Ctrl as you right-click the ring of fireplace stones once.
 - Craft a
 Tinder Drill and light the fire. Right-click the Fireplace and use the
  Roasted Nuts recipe to roast
  Any Nuts you collect and get much more energy from them. If you get any precious
  Gelatinous Lard during roasting, save it for later.
 - Build, fill, and light 2 more Fireplaces.
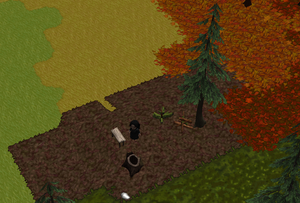
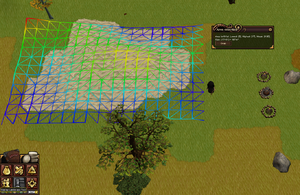
- In the bottom left of the User Interface, next to the chat icon, click the “Display Landscape Tool” and then click the button in the “Select area” window that pops up. Click and drag a rectangle over the clay pit to practice with this tool. Click the “Release” button. This tool will be useful when you are quarrying materials or flatting terrain for construction.
- Equip your
 Wooden Shovel, dig the
  Clay, and craft 12x
  Unburnt Clay Pot. To save weight, discard any branches and craft pots as you collect clay. Close the Landscape Tool.
 - Place 4 of these
 Unburnt Clay Pot in each of the 3 Fireplaces. Make sure all 3 Fireplaces are lit (smoking). This crude firing process takes 20 minutes and can result in either a
  Clay Pot or a
  Pottery Shard. Hopefully at least 4 clay pots survive for your trip to Providence.
Gluttony, Part 1
The previous task highlighted how tiresome it is to do strenuous activity and how frequently one has to replenish one’s Humours by eating food. By raising these 4 Humours, the character can carry more, work longer and replenish Humours less frequently. To do so, we will practice the gluttony mechanic one more time before leaving for the New World, and only focus on a single Food Group for the sale of simplicity: Nuts and Seeds.
|
| ||
|
| ||
|
| ||
|
|
'We will build on these basics on the Providence server in #Gluttony, Part 2'
Tip: In a 3rd Party custom client, you may wish to enable the follow checkboxes in the options menu:
|
- Begin by collecting and roasting some
 Stray Chestnut,
  Myrtle Oak Acorns,
  Pine Nut, and
  Hickory Nut. If you get any precious
  Gelatinous Lard during roasting, remember to save it for later.
 - Click the forks under the Humours to open up Gluttony Mode. Click 1x
 Roasted Chestnut to raise the “red” bile from 5 to 6. Click 1x
  Roasted Myrtle Acorns to raise the “blue” bile from 5 to 6. You may need more than 1x
  Roasted Myrtle Acorns if your Nuts and Seeds efficiency was previously reduced from 100% down to 50%. Repeat this with
  Roasted Pine Nuts to raise the “yellow” bile from 5 to 6. Assuming you previously gobbled a hickory nut during the tutorial; your Humours are likely an even 6/6/6/6 now.
 - Immediately after you raised your Humours for the third time, the gluttony forks likely reset and the Nuts and Seeds efficiency reset back up to 100%.
- Click the gluttony forks again to repeat this exercise for another 3 increases (always aiming to increase the blue, red, yellow, and black evenly) before the gluttony forks reset so you can repeat the cycle.
- Roasted Nuts are relatively “weak”. Even if you had a lot of nuts, you will eventually struggle to increase your Humours. At higher levels, more roasted nuts will be needed to go up by a single point, and as you gobble more nuts, more will be needed to overcome the resulting drop in efficiency. As you progress in the game, you'll not only be able to prepare foods that are both “stronger” and more efficient but also foods in different food groups that each start at 100% efficiency at the beginning of the gluttony session.
- Move your fork cursor outside your inventory and right-click to exit gluttony mode. Hovering over the
 Full and Fed Up debuff icon in the top left corner of the user interface will tell you how many minutes you need to wait before the gluttony forks reappear for your next session.
For more information, please consult the extensive wiki pages on Humours, Gluttony and Craving.
Learn More Skills
(Note to editor: ... Explain the 3rd Party Proficiency learning optimizer here at the beginning of this section.)
| Collect/Craft:
|
|
|
|
Learn  Exploration
- Study 1x Leafy Leftovers (from Tutorial), 1x Sand, and 1x Wood Choppings to learn Exploration.
Learn  Acute Tree Harvesting
- Study 1x
 Wood Choppings. Craft 1x
  Leafy Leftovers, study it once, and then click the
  Flora & Fauna proficiency bar to upgrade its cap from 700 to 900.
 - Study 1x
 Leafy Leftovers. Craft 1x
  Rock Maracas, study it once, and then click the
  Flora & Fauna proficiency bar to upgrade its cap from 900 to 1100.
 - Study 1x
 Leafy Leftovers. Craft 1x
  Flaming Pinecone, study it once, and then click the
  Flora & Fauna proficiency bar to upgrade its cap from 1100 to 1300.
 - Study 1x
 Flaming Pinecone and then click the
  Herbs & Sprouts proficiency bar to upgrade its cap from 500 to 700.
 - Study 1x
 Flaming Pinecone. Study 1x
  Oak Duff and then click the
  Herbs & Sprouts proficiency bar to upgrade its cap from 700 to 900.
 - Study 2x
 Woven Reeds and then click the
  Stocks & Cultivars proficiency bar to upgrade its cap from 500 to 700.
 - Study 1x
 Leafy Leftovers and 1x
  Squirrel Stash to learn Acute Tree Harvesting.
 - You can now craft
 Novice Toolbelt and can now gather more nuts, bark, and Inspirationals (e.g., Squirrel Stash) from trees.
Learn  Bark Gathering
- Study 1x
 Squirrel Stash to learn Bark Gathering.
 - You can now gather
 Birch Bark to make early game
  Tanning Fluid,
  Bark Boots,
  Barkpack, and
  Barkcup
Learn  Foraging
- Study 1x
 Rock Maracas and 1x
  Wood Choppings to learn Foraging.
 - You can now craft, among other things,
 Berries-on-a-Straw for early game Gluttony
Learn  Indian Tracking
- Study 2x
 Rock Maracas, 1x
  Sand, and 1x
  Simple Crucifix to learn Indian Tracking.
 - You can now craft
 Savage Charm as a great source of income when you travel to Providence.
Learn  Patchwork & Rags
- Study 1x
 Spinning Top to learn Patchwork & Rags.
 - You can now craft
 Jute Cap,
  Jute Pants, and
  Bark Boots.
Learn  Bug Hunting
- Study 1x
 Stray Chestnut and 1x
  Wood Choppings to upgrade your
  Hunting & Hideworking proficiency from 500 to 700.
 - Study 1x
 Stray Chestnut and 1x
  Wood Choppings to learn Bug Hunting.
 - You can now craft a
 Slingshot.
Learn  Essential Mineralogy
- Study 2x
 Heated Stone to upgrade your
  Mines & Mountains proficiency from 500 to 700.
 - Study 2x
 Heated Stone and 1x
  Sand to learn Essential Mineralogy.
Learn  Quarrying
- Study 2x
 Heated Stone and 1x
  Sand to upgrade your
  Mines & Mountains proficiency from 700 to 900.
 - Study 3x
 Heated Stone and 1x
  Sand to upgrade your
  Mines & Mountains proficiency from 900 to 1100.
 - Study 3x
 Heated Stone and 2x
  Sand to upgrade your
  Mines & Mountains proficiency from 1100 to 1300.
 - Study 2x
 Smooth Stone and 1x
  Rock Maracas to learn Quarrying.
 - You can now dig the
 Lime Pit in the SW and chip some
  Lime
Lime
Learn  Carpentry
- Study 1x
 Rock Maracas and 1x
  Wood Choppings to upgrade your
  Arts & Crafts proficiency from 500 to 700.
 - Study 1x
 Spinning Top to upgrade your
  Hammer & Nail proficiency from 700 to 900.
 - Study 1x
 Spinning Top and 1x
  Wood Choppings to upgrade your
  Hammer & Nail proficiency from 900 to 1100.
 - Study 1x
 Spinning Top and 1x
  Wood Choppings to upgrade your
  Hammer & Nail proficiency from 1100 to 1300.
 - Study 1x
 Spinning Top and 3x
  Wood Choppings to upgrade your
  Hammer & Nail proficiency from 1300 to 1500.
 - Study 1x
 Lumberwood Figurine and 1x
  Spinning Top to learn Carpentry.
 - You can now craft
 Stone Saw
Prepare for your Departure
Collect, craft and equip the following items before talking to the Native Guide to end the Tutorial and travel to Providence
- To protect you from any potential
 Coldsnap
  Hypothermia in Providence
 Novice Toolbelt
- For Bug Hunting
- For Leather Making
 Clay Pot (at least 4x but preferably 6x or more)
 Birch Bark (28x)
 Lime (2x)
- For your first 2x [Woven Basket]
 Hay (2x)
- For early game Trade Order
 Granite (6x)
Craft a Prospecting Tool
Choose your First Homestead
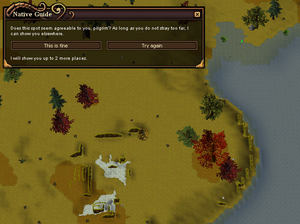
Once the in-game tutorial is completed and your character selects a homestead in Providence, the character is saved on the server and you can log out without losing your progress (Type :act lo and hit Enter to log out safely). The Providence server consists of the Town of Providence and the wilderness that surrounds it. The Tutorial's Native Guide will take you to a random ![]() Lean-to in the wilderness near the town of Providence and ask if you would like to make that Lean-to your Homestead or skip to another random Lean-to location. This process can be repeated until you are forced to accept the 5th and final option. As you will only be at this location for 1 day and you only care about the proximity to water, accept the first location that has a nearby lake or river and is not crawling with snakes (e.g.,
Lean-to in the wilderness near the town of Providence and ask if you would like to make that Lean-to your Homestead or skip to another random Lean-to location. This process can be repeated until you are forced to accept the 5th and final option. As you will only be at this location for 1 day and you only care about the proximity to water, accept the first location that has a nearby lake or river and is not crawling with snakes (e.g., ![]() Badlands).
Badlands).
The game allows ![]() Travel between your Homestead
Travel between your Homestead ![]() ... Home and
... Home and ![]() ... to Providence with items in your inventory. Traveling to either of these destinations from other locations in the wilderness requires that you first clear your inventory.
... to Providence with items in your inventory. Traveling to either of these destinations from other locations in the wilderness requires that you first clear your inventory.
PvE Dangers in Providence
It is advisable to read the article on Humours. When any one of your Humours reaches zero, you will become Knocked Out. For new players, this most commonly occurs through exhaustion (i.e., continuing to work despite depleted humours) or an encounter with an aggressive Creature:
 Timber Rattler can be found in nearly all the biomes of the New World, but is most commonly found in the
  Badlands. A single bite of their venom can poison you, slowly drain your Phlegm down to 0 and eventually knock you out.
  Timber Rattler Poison can be treated with
  Rattler Serum which is available from NPC Stalls for 250s or from other players for cheaper. While a snake will not follow you into shallow water it is best to outrun the snake as it will stop pursuing you once your are outside render distance. If you can't yet afford Rattler Serum, you can keep eating to keep your Humours up while collecting reeds in shallow water or autumn grass on land. You can place your valuables in reed or woven baskets, giving you more time to return to this location to recover them after you pass out from the venom.
 Bear should be avoided at all costs. Even if a Bear is across an impassable stream of water, their
  Roar causes
  Fear which will slowly drain your Black Bile down to 0 and eventually knock you out. It is best to remain vigilant, keep your camera zoomed out when hiking in the wild, and Run away if you are spotted by a Bear.
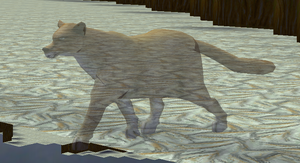
 Cougar should be avoided at all costs. This is challenging because cougars are translucent and very fast. It is best to remain vigilant, keep your camera zoomed out when hiking in the wild, and Run away if you are spotted by a Cougar.
PvP Dangers in Providence
Like other Skills, players can learn how to commit crimes such as trespassing on someone else's property (2000 ![]() Cloak & Dagger), taking someone else's property (4000
Cloak & Dagger), taking someone else's property (4000 ![]() Cloak & Dagger), and destroying someone else's property (5000
Cloak & Dagger), and destroying someone else's property (5000 ![]() Cloak & Dagger). They can also assault, batter, and murder (37500
Cloak & Dagger). They can also assault, batter, and murder (37500 ![]() Cloak & Dagger) players. In the case of non-criminals, they can be murdered if they are online.
Cloak & Dagger) players. In the case of non-criminals, they can be murdered if they are online.
Committing crimes drains Humours and leaves ![]() Evidence on the ground that other pilgrims can gather to seek justice. For example, destroying a wall on someone else's claim, will leave Evidence of Waste on the ground for 11 days which other pilgrims can pick up to (1) send that criminal to the Stocks in the Town of Providence or -- and this is disproportionately extreme -- (2) hire a bounty hunter to exact Revenge in a Trial by Combat. That bounty hunter will themselves leave scents for 9 days.
Evidence on the ground that other pilgrims can gather to seek justice. For example, destroying a wall on someone else's claim, will leave Evidence of Waste on the ground for 11 days which other pilgrims can pick up to (1) send that criminal to the Stocks in the Town of Providence or -- and this is disproportionately extreme -- (2) hire a bounty hunter to exact Revenge in a Trial by Combat. That bounty hunter will themselves leave scents for 9 days.
Continuing with the example of Waste, players with criminal characters (i.e., "alts") carefully consider their investment in Skills and Humours.[4] For a veteran, walking through an unlocked gate is easy, destroying a ![]() Stone Hedge is a breeze[5], destroying a
Stone Hedge is a breeze[5], destroying a ![]() Plank Fence requires a 200+ Humours character[6][7], and destroying a
Plank Fence requires a 200+ Humours character[6][7], and destroying a ![]() Brick Wall requires a 400+??? Humours character (i.e., several months in a massive base). In addition, aggressive defense structures like the Torchpost and the Blazing Brazier will hasten an attacker's Black Bile drain.
Brick Wall requires a 400+??? Humours character (i.e., several months in a massive base). In addition, aggressive defense structures like the Torchpost and the Blazing Brazier will hasten an attacker's Black Bile drain.
Visible valuables behind a weak fence are tempting (e.g., a visible full stockbin of black sand that suggests the player sifts and may have valuable glass and gold within[8]) and suggest high rewards for a relatively low risk/investment in a criminal alt.
Permanent Death in Providence
It is advisable to read the article on Permanent Death. For new players that don't engage in crime, Permanent Death is rare but could occur if they:
- Reach Level 10 Madness. Avoid this by simply not doing insane things.
- Get Knocked Out due to Max
 Disease. Avoid the often naked and frequently vomiting "disease alts" that are sometimes placed by other players in the Providence town square to spice things up. If you contract a Disease, note the relative frequency of each of the 4 symptoms to diagnose the disease. If you've progressed enough in the game, you can craft a cure or ask for help on Discord.
- Get Knocked Out while Outside under a
 Blood Moon season. Either be extra careful or avoid Providence and take the opportunity to create another "alt" for your homestead in the safe Tutorial instance.
- Are murdered by a criminal landing a
 Killing Blow. This is currently very rare for new players. Avoid interactions with strangers in the wilderness. Trades are best done in the Town of Providence where PvP is disabled.
Begin your Journey in Providence
Boil the Birch Bark, Part 1
At your homestead in the wilderness:
- Craft 2x
 Woven Basket and lighten your load by filling them with heavy valuables (e.g.,
  Granite,
  Lime,
Lime,  Clay Pot, etc.).
  Lift each
  Woven Basket and right-click your
  Lean-to to store them there. They can be retrieved by
- Build, fill, and light 4x
 Fireplace
 - Fill 4x
 Clay Pot with water and 16x
  Birch Bark and boil them over the
  Fireplace for 30 minutes. Tip: You can set a 30-minute timer in a 3rd Party custom client or your watch.
 - Move to the centre of your
 Lean-to and
  Travel to Providence.
Visit the Town of Providence
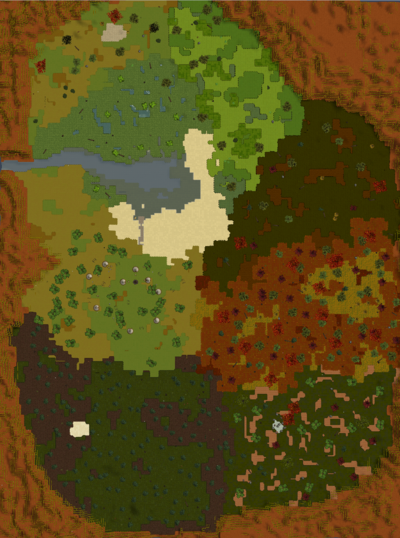
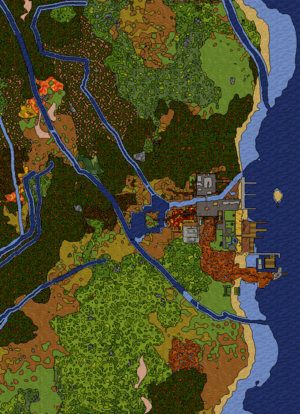
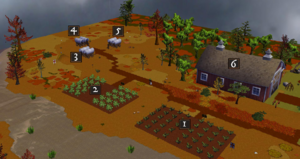
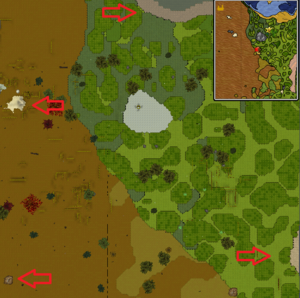
While the 1st of 2 batches of Tanning Fluid is boiling at your homestead, you can visit the Town of Providence for the first time. The Town property covers many biomes (See map below) and since PvP is disabled, it is a safe place to peacefully gather basic resources. For the next hour of game play (while 2 batches of Tanning Fluid boil), you will have 4 objectives. They are presented here in order of increasing importance and risk:
- Start your first Trade Order
- Raise your Humours
- Hunt Wartbite Cricket to learn the skill Tanning
- Sell valuables in order to buy 2x Nails (30s ea.) from Torvold Starkajärn for a Sawbuck and a Tanning Tub (assuming you have at least 6x Clay Pots at the Homestead).
- If you only have 4x Clay Pots at the Homestead, you will need 3x Nails so you can also craft a Bucket.
- Optionally, you can also buy 1x Pilgrim's Purse (5s) so you don't lose your coins when Knocked Out and 1x Rattler Serum (250s) so snakes don't knock you out.
- Player Stalls (blue canopy) may be offering these items for less than the NPC Stalls (white canopy) .
If at any point the 30-minute timer ends for the 1st batch of Tanning Fluid, skip ahead to #Boil the Birch Bark, Part 2 to set up the 2nd batch of Tanning Fluid and then return to the objectives in this section.
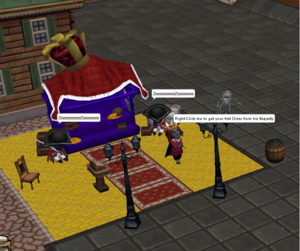
Visit His Majesty's Stall
- Right-click His Majesty's son to receive your first Trade Order.
- Visit the nearby berry bushes, across the bridge and near the barn, and pick 20 berries.
- Grab each berry in your inventory and right-click the trade order in your inventory to deposit the items in it.
- Return to His Majesty's son, grab the completed trade order in your inventory and right-click him to hand it in and then receive your second order.
Most entry-level Trade Orders can be completed on the safe grounds of the Town (with some delay between orders). The one exception is the request for 6x Granite. While Granite isn't particularly hard to find in the wild, you conveniently brought some along from the Tutorial and stored it in your Lean-to in the wilderness. If you complete that request before you build your prospecting tool, then you won't have to lug the granite with you to the next location.
As you complete the other 3 objectives in this section, you can pick up the necessary items for the Trade Order, slotting them right away (Step 3 above) so they don't take up any weight in your inventory.
Gluttony, Part 2
Higher Humours will make many aspects of game play easier, including cricket hunting.
You may have noticed the icon for a specific food recipe next to the Gluttony forks. This is your current Craving and satisfying it by eating it (not gobbling it in Gluttony mode) will grant your 1 point to each Humour. If you don't satisfy that specific craving but instead inadvertently eat an item in the same Food Group as your Food Craving you will gain 1 point to a random Humour.
Building on the basics of #Gluttony, Part 1, your Gluttony options now span several food groups. As you complete the other 3 objectives in this section, and if convenient, collect and craft some of these items below when you can so you're ready when the Gluttony forks appear. As this isn't an immediate priority, short 1 or 2 item Gluttony sessions are fine. The Full and Fed Up debuff won't last long between sessions.
During a Gluttony session, focus on raising one Humour at a time by focusing on one row at a time in the table below. Keeping these 4 clusters of Gluttony foods organized on-the-go (e.g., "red" foods, "blue" foods, etc.) will be easier once you craft a Barkpack later on, which has 4 rows of inventory space. As detailed in the Gluttony article, and for reasons that will become apparent at higher levels, it is best for new players to keep their 4 Humour levels relatively equal.
We will build on these basics, and introduce ![]() Autumn Delight,
Autumn Delight, ![]() Froghetti, and
Froghetti, and ![]() Garlic Stuffed Mushrooms (40+ Humours), at our new base in #Gluttony, Part 3.
Garlic Stuffed Mushrooms (40+ Humours), at our new base in #Gluttony, Part 3.
| *Blood | (Cranberry) |
(Lobster Mushroom) |
N/A | |||
| *Phlegm | (Crowberry) |
(Sugar Caps) |
||||
| *Yellow Bile | (Huckleberries) |
(Lobster Mushroom) |
||||
| *Black Bile | (or |
(Blackberries) |
(Sugar Caps) |
N.B. Some items in the table have been omitted for the sake of simplicity.
Hunt Crickets
| Collect:
|
|
In order to make the Leather for our prospecting tool, we need to learn how to tan leather. The ![]() Wee Menagerie and the
Wee Menagerie and the ![]() Cricket Team are great Inspirationals for leveling up your
Cricket Team are great Inspirationals for leveling up your ![]() Hunting & Hideworking proficiency and learning the skills
Hunting & Hideworking proficiency and learning the skills ![]() Small Game Hunting,
Small Game Hunting, ![]() Hideworking, and
Hideworking, and ![]() Tanning. We will need to collect the items on left and this will be our first introduction to hunting.
Tanning. We will need to collect the items on left and this will be our first introduction to hunting.
- Equip your slingshot in your left hand and grab a couple of stones for your inventory.
- Replenish your Humours (particularly your Yellow Bile), and go find some crickets in Providence.
- When there's a clear path between you and the cricket, left click the cricket to face it, and then hit F8 to shoot a stone at it. The cricket has 1HP and will lose 0.5HP from the shot. At this point you can either:
- Hit F8 to shoot it again with another stone; or
- While you remain still and the cricket now hops towards you, hit F9 to Stomp it shortly before it reaches you. If you're too late, back up to increase the distance between the two of you and try again.
- Pick up the dead cricket, replenish your Humours, and repeat with another cricket.
Attacking consumes Yellow Bile and the strength of the attack is based on your current Yellow Bile. If you deplete your Yellow Bile, your continued attacks will no longer do Blood damage and you may even knock yourself out. Always be mindful of your Humours.
With a little practice, you will no longer need to waste stones shooting crickets. As you complete the other 3 objectives in this section, crickets will wander into your path and you can simply tap F9 to stomp them for a one-shot kill without much thought.
Forage Valuables
You need to buy the essentials in Providence and foraging valuables in the wilderness is one of the best ways to make money in the early game. There are two mechanics at play here. Forageables, including valuables, are found on the ground when YOU walk around the map tiles are loaded by the server. Forageables are also spawned by the game in ![]() Hollow Stump and
Hollow Stump and ![]() Hollow Log when ANY PLAYER walks around and "map tiles" are loaded by the server. Unlike ground foreagles, the contents of Hollow Stump and Hollow Log will persist even after a player has left and the server has unloaded the map tiles. For this reason, the contents of a Hollow Stump and Hollow Log will be more lucrative in more frequent areas.[10]
Hollow Log when ANY PLAYER walks around and "map tiles" are loaded by the server. Unlike ground foreagles, the contents of Hollow Stump and Hollow Log will persist even after a player has left and the server has unloaded the map tiles. For this reason, the contents of a Hollow Stump and Hollow Log will be more lucrative in more frequent areas.[10]
It's hard to predict where the most frequent areas are but if one were to visualise a heat map, one would expect the most walking activity (both currently and historically) in the wildnerness just outside the Town of Provindence, decreasing gradually as one continues into the wilderness near the Town of Providence where the Native Guide brings all new players, and then dropping off in frequency in the deep wilderness, beyond the Native Guide's drop off area. As the same is likely true for the probability of encountering other players in the wild, it might be intimidating (exciting?) for a new player to start foraging just outside Providence.
Later on you can create a low-investment foraging character to do just this (on a ![]() Giant Cricket!) but for the purposes of this walktrough, with your very first character, let's travel back to your
Giant Cricket!) but for the purposes of this walktrough, with your very first character, let's travel back to your ![]() ... Home in the wilderness where both the risks and the rewards are lower. You can of course choose your own risk tolerance.
... Home in the wilderness where both the risks and the rewards are lower. You can of course choose your own risk tolerance.
While keeping an eye on your Humours and an eye out for any aggressive Creature, look on the ground and inside any ![]() Hollow Stump or
Hollow Stump or ![]() Hollow Log. Exploring the wilderness is one of the joys of Salem and along the way (between stumps and logs) you can (1) collect items for Trade Orders, (2) collect forageables for Gluttony sessions, and (3) stomp any nearby crickets to craft Cricket Teams.
Hollow Log. Exploring the wilderness is one of the joys of Salem and along the way (between stumps and logs) you can (1) collect items for Trade Orders, (2) collect forageables for Gluttony sessions, and (3) stomp any nearby crickets to craft Cricket Teams.
Collect or Craft the following valuables:
 Dried Timber Rattler Skin (Sells for 4s at the NPC Stalls)
- Note that you'll need at least to of these later for your leather making but you can set aside more if you'd like to craft a Frontiersman's Duster to keep you warm and a Patchwork Pocket to keep your Rattler Serum safe.
 Indian Arrowhead (Sells for 4s at the NPC Stalls)
 Indian Feather (Do not sell. Use it to craft Savage Charm)
 Savage Charm (Sells for 30s at the NPC Stalls)
- The occasional
 Silver Coins (5s)
While not mission critical, you should also grab any of the following valuables:
 Wild Columbine (Used in the cure for
  Frontier Flux)
 Leech (Used in the cure for
  Maroon Fever and for a beginner Trade Order)
 Orange Easter Egg (Used to access The Den to reduce Madness)
 Purple Easter Egg (Valuable and also useful later for leveling
  Cloak & Dagger for hunting weapons)
 Porcupine Spines (Valuable and also useful later for leveling
  Cloak & Dagger for hunting weapons)
 Whispering Snake Skull (Valuable and useful later for leveling
  Cloak & Dagger for hunting weapons)
 Those Rarefied Thornbush Flowers (While this currently sells to veterans for 500s++, these bushes are most often found in the Badlands near snakes. This might be intimidating for a new player but you should absolutely forage these as soon as you're ready.)
| Tip: In a 3rd Party custom client, you'll find buttons in the bottom of the user interface to point in the direction of your homestead and start walking towards it. |
Boil the Birch Bark, Part 2
When the 30-minute timer ends for the 1st batch of Tanning Fluid, return to your homestead in the wilderness. Between the 4x Clay Pots, the 20L of bark and water will have boiled down to 12L of Tanning Fluid. We will need at least 20L so we're going to cook a second batch of Tanning Fluid in 3x Clay Pots. This will take 30 minutes.
Start by removing all the Soaked Bark from the Clay Pots. Place 8x ![]() Soaked Bark on 4x
Soaked Bark on 4x ![]() Drying Frame and discard the remaining Soaked Bark. In 30 minutes, you will have 8x
Drying Frame and discard the remaining Soaked Bark. In 30 minutes, you will have 8x ![]() Dried Bark.
Dried Bark.
If you have 6x Clay Pots at your disposal,
- Consolidate the Tanning Fluid. Grab a Clay Pot containing 3L of Tanning Fluid and right-click another Clay Pot in your inventory. This will transfer the fluid, giving you a full, 5/5L Clay Pot, and a 1/5L Clay Pot.
- Repeat this until the 12L of Tanning Fluid is consolidated in 3 Clay Pots (5L, 5L, 2L) that you can store in your Lean-to.
- Load up the other 3 Clay Pots with water and Birch Bark and refuel/re-light the Fireplaces under them.
If you have 4x Clay Pots at your disposal,
- Use 1x Nails to craft a Sawbuck and 1x Nails to craft a Bucket.
- Consolidate the Tanning Fluid. Grab a Clay Pot containing 3L of Tanning Fluid and right-click the Bucket in your inventory. This will transfer the fluid, giving you a 3/10L Bucket and a 0/5L Clay Pot.
- Repeat this until the 12L of Tanning Fluid is consolidated in 1 Bucket and 1 Clay Pot (10L, 2L) that you can store in your Lean-to.
- Load up the other 3 Clay Pots with water and Birch Bark and refuel/re-light the Fireplaces under them.
Boil the Birch Bark, Part 3
When the 30-minute timer ends for the 2nd batch of Tanning Fluid, return to your Homestead in the wilderness.
Craft a Barkpack and a Barkcup
Using the 8x ![]() Dried Bark craft a
Dried Bark craft a ![]() Barkpack which will reduce the weight of items in it and a Barkcup which can optionally and if necessary be used to drink Any Tea, Willowbark Tonic and Raw Egg Yolks.
Barkpack which will reduce the weight of items in it and a Barkcup which can optionally and if necessary be used to drink Any Tea, Willowbark Tonic and Raw Egg Yolks.
Craft Leather
We will need to,
- Study 1x
 Wee Menagerie to learn Small Game Hunting;
 - Study 1x
 Cricket Team, and 1x
  Spinning Top to learn Hideworking; and
 - Study 1x
 Cricket Team, 2x
  Spinning Top, and 1x
  Wood Choppings to learn Tanning,
but our ![]() Hunting & Hideworking proficiency isn't high enough.
Hunting & Hideworking proficiency isn't high enough.
- Use the Proficiency Learning Optimizer or any convenient combination of Cricket Team, Wee Menagerie, Stray Chestnut, and Rock Maracas (in order of decreasing strength) to level up your
 Hunting & Hideworking proficiency and then learn Tanning.
 - Build a Sawbuck and then a Tanning Tub.
- Transfer at least 20L of Tanning Fluid to the Tanning Tub.
- Fill a Clay Pot or Bucket with water and then right click it with 1x Lime to make Milk of Lime.
- Use the Limed Hide recipe craft 2x Limed Hide and place them in the Tanning Tub.
In 8 hours, you should have 2x Leather. Ironically, if you're unlucky, you might get Foetid Ooze and have to restart the tanning process with another limed hide but you won't need to reboil the Tanning Fluid.
Craft a Woo-Woo-Wand
- We will need to study 1x
 Walking the Beetle, 1x
  Smooth Stone, and 1x
  Stray Chestnut to learn Prospecting, but our
  Mines & Mountains proficiency isn't high enough.
 - Study Walking the Beetle to keep leveling up
 Mines & Mountains and then learn Prospecting
 - Craft the
 Woo-Woo-Wand.
 - Salvage your structures in the hopes of getting back some Nails, pack up your belongings (heavy stuff in the Barkpack) and head back to ... to Providence
Scout a New Location
You're back in Providence but this time you have some experience, some skills and some money under your belt, not to mention a prospecting tool in your belt. You're ready to set off into wilderness again and while the Native Guide initially dropped you off in the around surrounding the Town of Providence, the Wilderness Guide can take you much further.
Wilderness Guide
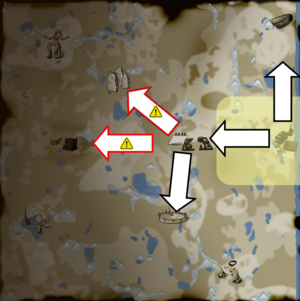
For a fee, the Wildness Guides in Providence (near the barn) can quickly take you North, or West to Limers Front. For another fee, the Wilderness Guides in Limers Front can take you North, West, or South but beware that the journey North or West, into the Darkness, is not recommended for new players. These travel fees are an absolute bargain. Far from Providence, you'll encounter less players and more untouched wilderness.
Prospecting
Once you've hitched a ride with the Wildness Guide you can switch to prospecting mode to see mine nodes and well points on the ground. You're ready to scout the perfect location, but what exactly is the perfect location? Some players like to build their homestead near all the resources they'll need whereas others seek out the very opposite, a hard-to-find location that is far from any resources and waterways. There's no shortage of opinions on Discord and you'll have to decide what's most important/enjoyable for you. Here are some considerations to help you decide.
| Resource | Use | Alternatives |
|---|---|---|
| A variety of Biomes | Different biomes have different resources. |
|
| Nearby Game Trails are great for Big Game Hunting. Bears are 4 times more likely to spawn on a Game Trail and Deer are 8 times more likely. |
| |
| In my opinion, water is the most important resource to have near your base. Aside from the resources that spawn here, shallow water is a great source of water for your gardening (1L per pot), cooking, baking, leather making (1L per leather), jute making, soap lathering, and rusty coin washing. The Shallows is also the only place one can |
| |
| The Deep is the only place you can place a |
| |
| Unless you are salvaging materials from other basses you will use a lot of Clay for gardening pots, bee skeps, and the numerous structures that require bricks. New players should scout a location near a Clay Pit. |
| |
| Lime is not as plentiful as Clay but you'll need a lot of it for making pig iron (12x), gardening pots (1x), making mortar (1x), liming hides (4x), and crafting some inspirationals. Unfortunately, Lime Pits tend to be small so it's likely that you'll eventually exhaust any Lime that you find near your base. |
| |
| Flat terrain | You can't build on uneven terrain or special terrain features like water, clay pits, and lime pits. If you decide to build a |
|
Example
For the purposes of this Walkthrough we will select an iron node in a relatively flat location with Clay, Lime, and Water within walking distance but not too close to impede our future construction.
Plan a Self-Sufficient Homestead
Having found the perfect spot, it's tempting to break ground, make a nice homestead, build everything you've learned to build, and start storing items in a sea of containers that stretches out to the horizon. In the wise words of Bill Burr if you don't think about your homestead's defence first, "all you're doing is gathering supplies for the toughest guy on the block." (Bill Burr: You People Are All the Same, 2012).
You may have visions of harvesting some lovely produce in a nice little orchard on your homestead but this is not Farmville. You need to remember that for PvP raiders in Salem, you are the orchard. For as long as you make it easy for them, they will periodically come harvest your valuables like a berry bush. Crime cannot be prevented, only deterred. Theft alts carefully consider the risks and rewards. You need to do the same. If your defences are low, then the visible rewards on your homestead need to be low as well.
You may recall that the first three levels of fences don't provide any meaningful protection. "The actual protection starts with plank wall. The normal disposable theft is not able to damage it (from what I used and what I killed, the thefts people and I use end around 180/100/100/180 so they cannot go through plank soak). The entry level to plank is oiled boards though, so it has some more of an initial cost."[11] (Vesemir, Discord #general, 2023-04-18 20:39) Our homestead will start as a simple farm, making cotton and cottonseed oil until we have the materials we need to build a proper Plank Fence and a proper homestead. I recommend reading all the way to the end of this walkthrough before you start building.
Tilled Fields
You can build a 4x4 ![]() Tilled Field on relatively flat ground. This is much easier with a
Tilled Field on relatively flat ground. This is much easier with a ![]() Wooden Hoe equipped. On this bran new, 100% upkeep field, you can right-click 5 humus and then 50 seeds of cotton. It will be ready for harvest in 4 days. This 100% upkeep can shoot up to 600% (i.e., 30 humus and 300 per field) if a crow lands on the field. While you can build scarecrows, there is an easier way.
Wooden Hoe equipped. On this bran new, 100% upkeep field, you can right-click 5 humus and then 50 seeds of cotton. It will be ready for harvest in 4 days. This 100% upkeep can shoot up to 600% (i.e., 30 humus and 300 per field) if a crow lands on the field. While you can build scarecrows, there is an easier way.
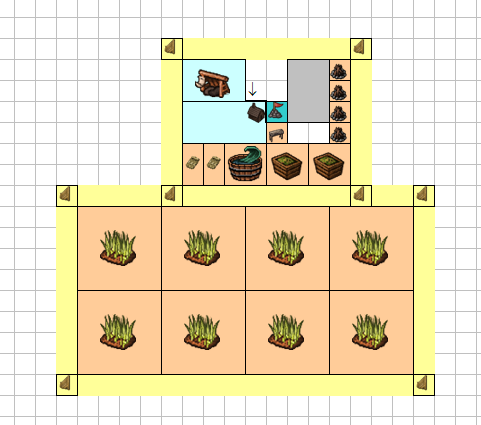
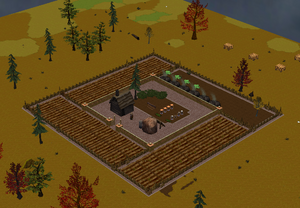
Crow spawn on certain biomes but not on dirt and not on pavement. In this walkthrough, we will convert an 8x16 area (i.e., 8 fields) into dirt, surround it with pavement so that nearby biomes can't spread into the dirt area and then place a fence on this perimeter so that crows spawning on biomes can't wander into the safe area.
Switch to landscape mode (See "Craft Clay Pot" above), and click "dig" from the action menu. Left-clicking a tile on the ground transfers 1 unit of elevation from the ground into 1 unit of dirt above the character's head, up to a maximum of 10 units. Right-clicking a tile on the ground transfers all the units of dirt from above the character's head (max of 10) to the ground, raising its elevation. While you can use this to systematically flatten an area, if the area is already flat, you simple need to dig up a little dirt and then place it back down. This will convert it from a biome to dirt.
With paving materials in your inventory, click Pave from the action menu and click the ground to pave it. As a personal preference, if you would like your pavement to be uniform, then you should only keep one category of material in your inventory (e.g., smooth stone, stone, flint) and not others (e.g., hay, clay, granite, gneiss, etc.). Next, you can build a makeshift fence and gate on this paved perimeter.
Finally, with a wooden hoe equipped, you can build a tilled field by selecting it from the build menu and then clicking the point in the center of a 4x4 area. Repeat this to build 8 tilled fields.
To save money early on, I don't build these fields on my personal claim (the area shaded in light blue in the picture below) but it would of course be safer to do so.
Humus
A compost bin filled with organic materials will slowly convert these into humus. If you open it, you'll be able to transfer the humus from the bin's inventory to your personal inventory. Adding Common Earthworms and Earthworm Pythons to this inventory screen will increase the bin's efficiency, up to a maximum of 100%.
50x Cotton seeds can be purchased from Spuds McArtor in providence for 175 silver. You can buy all the seeds you need or start with a small supply and increase it yourself after each harvest.
Each 100% upkeep field will require 5 hummus and 50 cotton seeds and will be ready for harvest in 4 days. This can be modified with fertilizer that is applied after the humus and seeds. Early on you'll have access to:
 Humus (free) and
  Crown Manure (1750 silver) which increase both the speed and yield of your harvest,
 Wood Choppings which decreases how much humus and seeds you'll need for future plantings, and
 Hay which increases influence and is beyond the scope of the walkthrough
For this first planting, keep adding Wood Choppings to each field until you can't anymore. This will reduce the upkeep from 100% to 50%, such that you'll only need half the humus and seeds next time. For your future plantings, you'll only need 1x Wood Chopping to maintain this 50% upkeep. You can read more about fertilizers in the Fertilizer page as well as in the articles for each fertilizer.
Fresh Boards
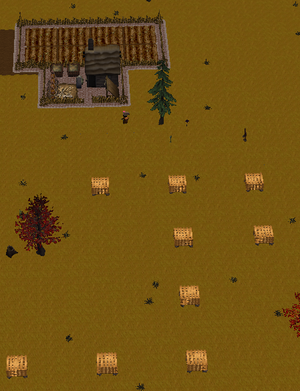
While you're waiting for the cotton to grow over the course of 4 days (or less with "speed" fertilizer), you can dry some boards over the course of 3 days. Build several ![]() Timber Pile at least 5 tiles away from each other and anything with a hitbox (Ctrl+6 on the custom client toggles hitboxes on/off).
Timber Pile at least 5 tiles away from each other and anything with a hitbox (Ctrl+6 on the custom client toggles hitboxes on/off).
A ![]() Fresh Board can be transformed to a
Fresh Board can be transformed to a ![]() Dry Board and then a
Dry Board and then a ![]() Planed Board and then an
Planed Board and then an ![]() Oiled Board. An easy rule of thumb is to plan for a 50% success rate for each transformation and dry the appropriate number of boards (e.g., start with at least 9 fresh boards if you need 6 dry boards for a Carpenter's Bench). Since the process takes 3 days, it's better to have too many than too few boards for your early game items:
Oiled Board. An easy rule of thumb is to plan for a 50% success rate for each transformation and dry the appropriate number of boards (e.g., start with at least 9 fresh boards if you need 6 dry boards for a Carpenter's Bench). Since the process takes 3 days, it's better to have too many than too few boards for your early game items:
 Carpenter's Bench (9)
 Press (7.5 + 4.5 = 12)
- Multiple?
 Oiling Trough (6 + 4.5 = 10.5)
  Cotton Cleaner (10.5)
 Loom (10)
- Multiple?
 Simple Bed (12)
 - Multiple
 Mine Support (4)
 - Multiple
 Stockbin (36)
  Plank Fence for a 19x19 area (306 + 265.5 + 71 = 336.5)
You don't need all the boards for everything right away. It will take time to grow enough seeds to make enough oil for the Plank Fence's oiled boards.
To save money early on, I don't build these timber piles on my personal claim but it would of course be safer to do so.
Cotton & Dry Boards
Once the fields are harvested, ![]() Raw Cotton can be cleaned using the
Raw Cotton can be cleaned using the ![]() Clean Cotton action in the crafting menu to produce the corresponding
Clean Cotton action in the crafting menu to produce the corresponding ![]() Clean Cotton and 10x
Clean Cotton and 10x ![]() Seeds of Cotton. Using a
Seeds of Cotton. Using a ![]() Cotton Cleaner will Clean Cotton significantly faster. The seeds can be replanted (building more Tilled Fields as needed) and the cotton can be woven into cloth for sale to the stall in Providence (6s), for clothing, or for some early game items:
Cotton Cleaner will Clean Cotton significantly faster. The seeds can be replanted (building more Tilled Fields as needed) and the cotton can be woven into cloth for sale to the stall in Providence (6s), for clothing, or for some early game items:
Cottonseed Oil and Oiled Boards
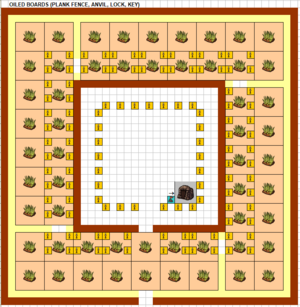
Once you're happy with the number of cotton fields and you have excess seeds, you can make cottonseed oil in a press and transform Planed Boards into Oiled Boards over the course of 2 days. You will need 21 oiled boards for the fence layout below.
Note that the Press is currently broken [12] (Marp Tarpton, Discord #general, 2023-07-28 10:28) as it cannot be salvaged after it is placed, only destroyed.
Plank Fence
Once you have a sufficient number of Dry Boards, Planed Board, Oiled Boards, Leather, and Nails, you can fence off the 19x19 inner core area as per the layout above.
Fences that are OLDER than 7 days will send out a wave of Splash Damage which will damage the nearest Fences of an equal or lesser tier. You can safely salvage and modify your fence layout in these 7 days (correcting any error) but any salvage action after these 7 days will require very costly repairs. The high cost of repairs is to discourage defenders in a siege from simply repairing fences as fast as attackers damage them.
Mine Entrance
To lock our gate, we'll need to craft an ![]() Anvil (5x Bar of Pig Iron), a
Anvil (5x Bar of Pig Iron), a ![]() Lock (1x Bar of Pig Iron), and a
Lock (1x Bar of Pig Iron), and a ![]() Key (1x Bar of Pig Iron). In the process, we'll set up our own iron production for our base.
Key (1x Bar of Pig Iron). In the process, we'll set up our own iron production for our base.
To be continued....
Next Steps
Brick Wall
Town Bell
Siege Defences, Iron Wall, etc.
...UNDER CONSTRUCTION...
