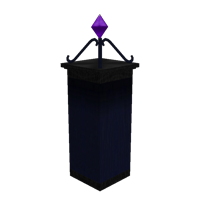
Iron Wall
| ||||||||||||||||||||||||||||
About
External FencesExternal Fences, also known as Walls, are Fences which are used as a Defense against Fence ConstructionAll Fences have four basic components a Starting Post, a Corner Post, a Fence Segment, and a Gate. To construct a Fence a Starting Post must first be built; when building a Starting post do NOT use ctrl to detach it from the building grid, or else the sections may not line up correctly. Once your Starting Post has been completed, you can right-click it and select the cardinal direction you wish to extend you Fence in, this will build a Fence Segment. Right-clicking a Fence Segment give you the option to keep extending your Fence in the same direction or build a Corner Post which allows you to again extend your in any direction. To build a Gate, leave a 2 tile gap between two Posts. Righting-clicking on either of these posts will then give you the option to build a Gate. Splash DamageFences are not indestructible and can be Destroyed by well-prepared raiders. A Fence's strength is dependent on its tier - the higher the tier, the harder it is to Destroy. Once External Fence Tiers
Building StructuresSelecting a structure from the build menu or its sub-menus will place a Building Blueprint Sign at the position of the cursor and then clicking a valid building location on the ground will place the sign and open a window prompting the player to deposit the necessary materials and build the structure. Each material is followed by a series of three numbers.
Players can take their time building structures by depositing and committing resources to the build sign by clicking the "build" button. The character will build as much of the structure as they can with the available resources. They can return with more resources in the future. Note that if no resources are deposited, the build sign will disappear when the player walks away. If resources are deposited, but the player hasn't built them into the structure, the uncommitted resources will slowly disappear over time. This is to combat players using build signs as cheap and overpowered storage containers they can deposit and retrieve resources from. |
|
